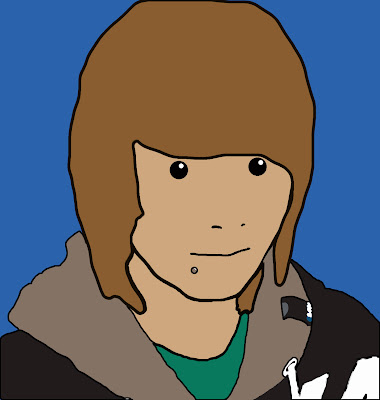
I created a Julian Opie inspired self portrait image using Photoshop.

To do this; I started by having my photograph taken and loaded it into Photoshop. I then created a new layer and used the Lasso tool to select my face. When I had made my selection I went to 'Select/ Modify/ Smooth' and selected a value of around 12, although this was significantly lower for smaller areas. This smoothed to edges of my selection, getting rid of harsh corners. I then selected a skin colour and using the Paint Bucket tool, I applied it to the new layer. I repeated this method for other sections of the image, such as hair and jacket.
Once all of the sections of the image had been coloured I then added detail such as eyes and mouth using the Pencil.
To create the eyes, I chose a larger brush size and made black dots over the place where the eyes were on the original image. I then scaled down the brush size and placed small white dots within the black dot. I create the nose and mouth I simply traced over the original image.
I used the Stroke effect to create the outline around each section. To do this I chose the layer which contained the section I wanted to outline and selected it's content. I hovered over the selection with the curser and 'Ctrl+Clicked' it which revealed toolbar allowing me to select Stroke (Outline) Selection... A Dialogue box then comes up which allowed me to selected the thickness and colour of the line I wanted to outline my selection - My choice for this varied depending on the section.
To finish the image off, I made a layer just above the original image and filled it with a block colour, this created my background.

